When Easter is around the corner, I’m sure there are many of you out there who dye the eggs in your pantry, because they are one of the long-time traditions of Easter, along with making edible sweet Easter eggs, decorating Easter baskets, planning and preparing an Easter egg hunt and more.
Well, growing up if you’ve always used artificial dyes to color your eggs, how about try out something new this year-round – dye them naturally! Yes, it is possible and I’ll tell you how!
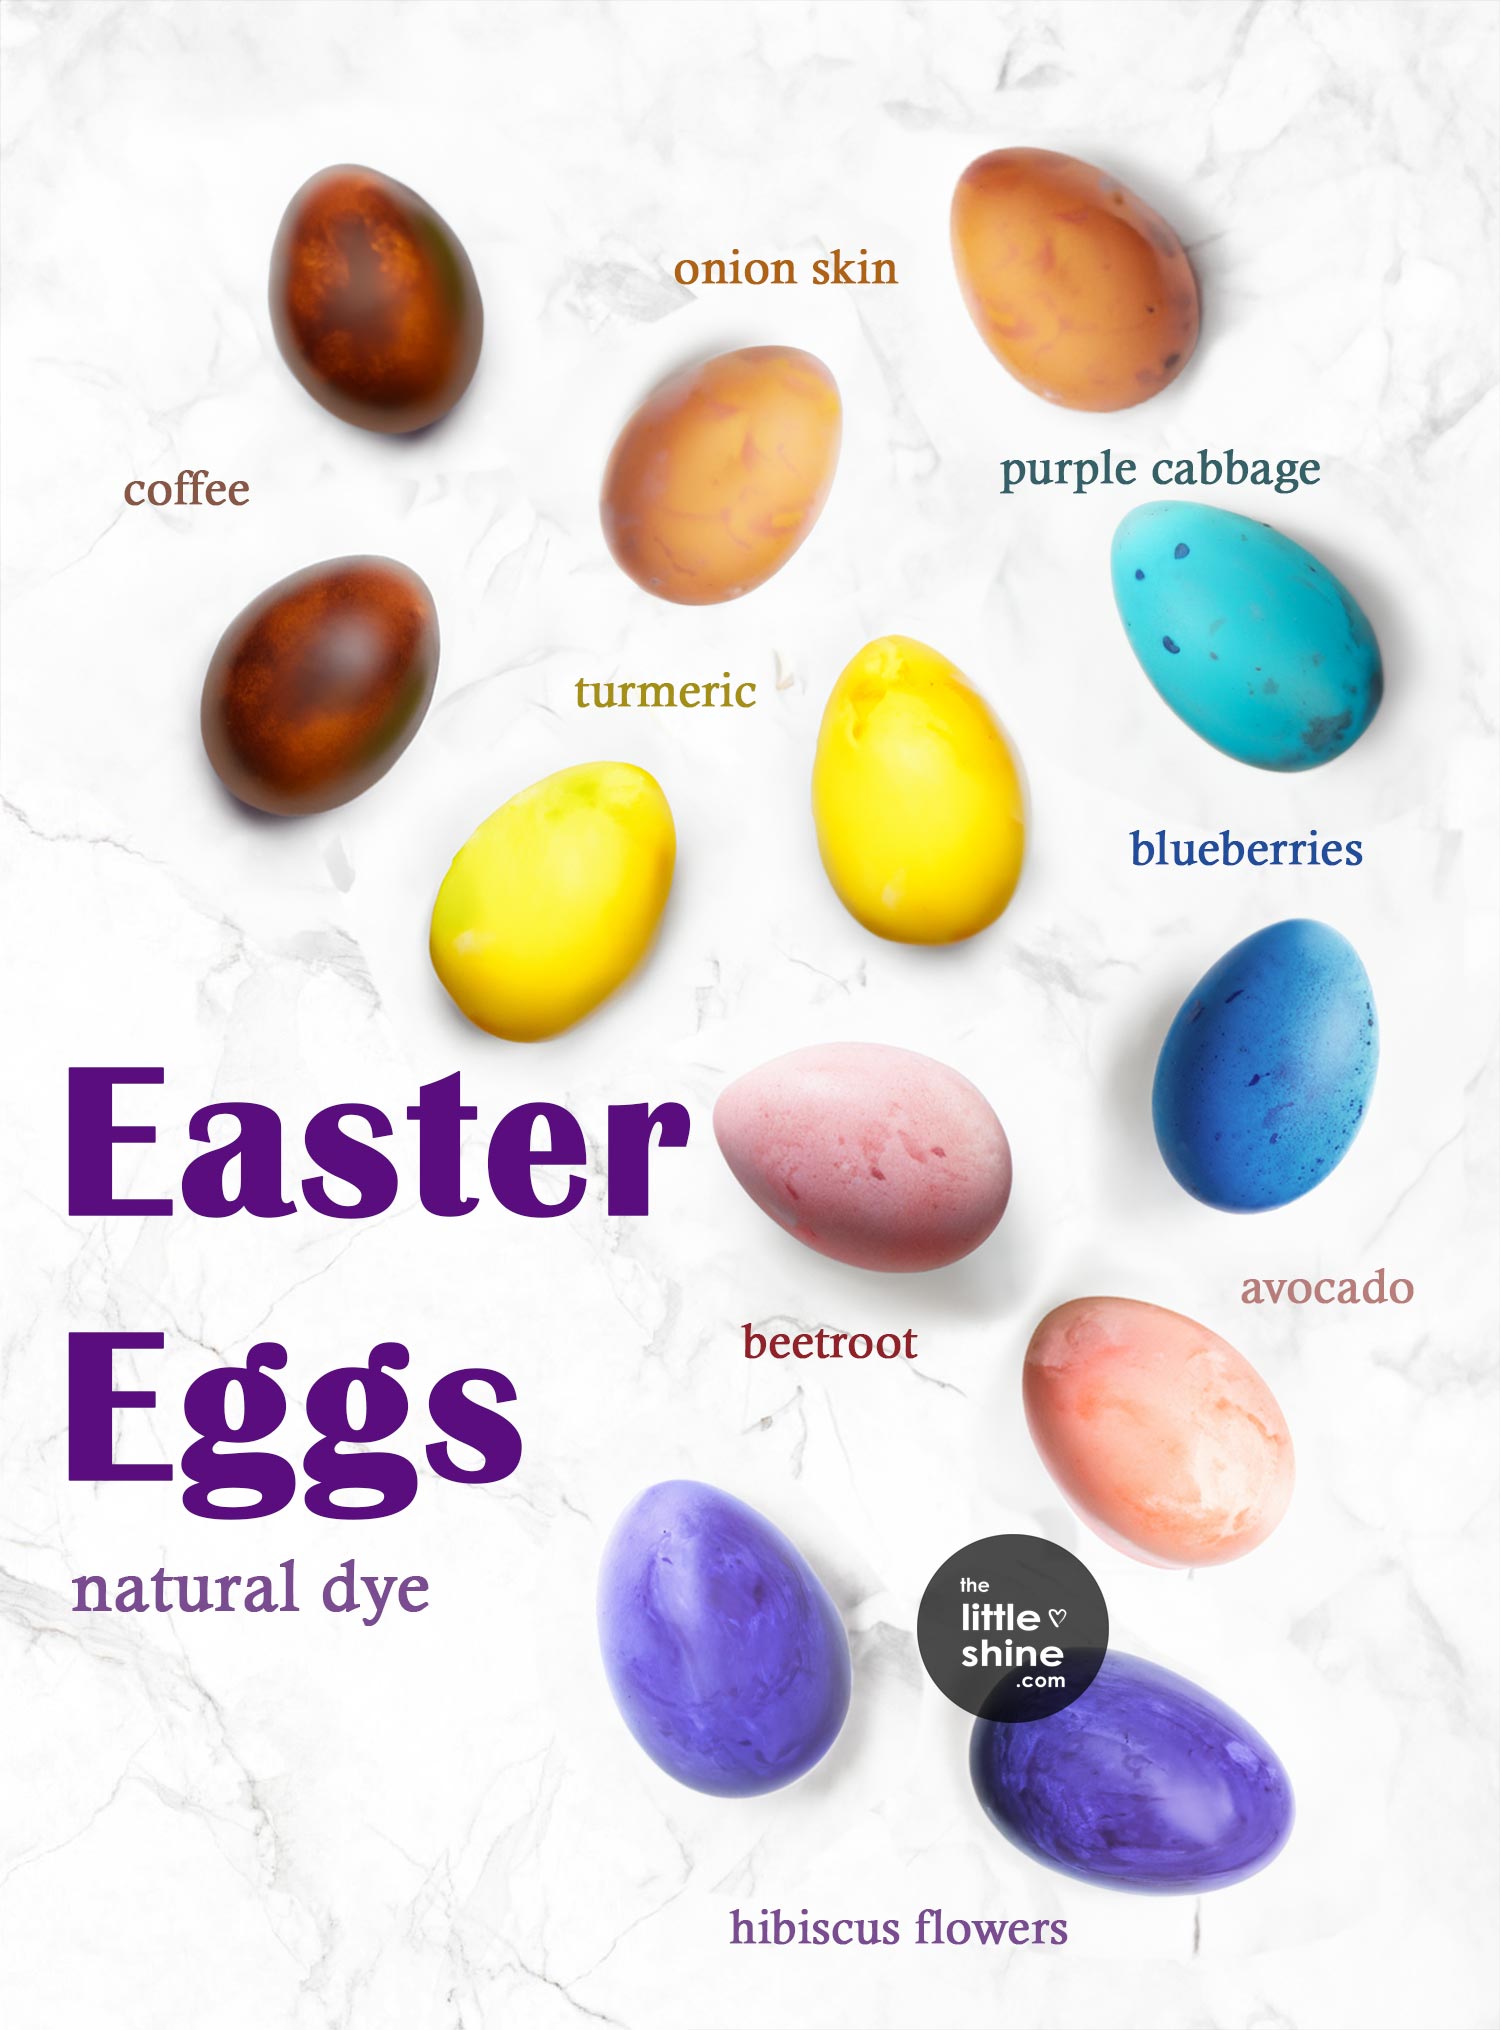
Natural Ways to Dye Easter Eggs into 8 Colors
What ingredients do you use to get the natural dyes?
Lavender or indigo colored eggs – 2 cups dried hibiscus flowers
Orange/rust colored eggs – 2 cups yellow onion skins
Blue colored eggs – 2 cups blueberries
Reddish colored eggs – 2 cups red/pink onion skins
Blue (on white eggs)/green (on brown eggs) colored eggs – 2 cups chopped purple cabbage
Yellow colored eggs – ¼ cup turmeric powder
Green colored eggs – 2 cups avocado peels (Or you could also use 2 cups of chopped purple cabbage and ¼ cup ground turmeric powder, soaking them separately to obtain the color green)
Reddish pink (on white eggs)/maroon (on brown eggs) colored eggs – 2 cups shredded beetroot
How to naturally dye Easter eggs?
Step 1: Choose a color and simmer with water
Choose a color of your choice from the list of ingredients mentioned to obtain the natural dye colors.
Then, add it into a heating pot, along with 2 cups of water, cover it and let it boil and then simmer for 20 to 30 minutes, until the water is well colored.
Note: You can also merge a couple of colors to get different hues.
Step 2: Strain the liquid and add vinegar
Strain the dyed liquid into a container and then, for every 1 cup of the strained liquid dye, add in 1 tablespoon of distilled white vinegar (add the vinegar once the strained dye water has cooled).
Step 3: Soak in the eggs
You will have to pre-make the hard boiled eggs and soak them in this natural dye overnight or for 8 to 10 hours. Just know that the longer they remain in the dye, the more vibrant and darker their colors will be. Place it in the refrigerator.
Note: You could also use raw eggs, instead of hard boiled eggs for the dyeing process, but this will mean that you need to ensure caution, so as to not let any of the eggs crack.
Note: In case you feel that your eggs haven’t dyed dark enough, you can put them back and let them soak for a few more hours.
Step 4: Remove from the dye and dry the eggs
After the soaking time has lapsed, then you will need to dry your eggs. Place a towel on your kitchen counter and gently place your eggs over them side by side. Leave your eggs to air dry. Make sure not to rub or touch them while they are drying as the color will rub off.
Note: In case you feel the like eggs could stain your towel, then you could place a wire rack over your towel and then place your eggs.
Step 5: Gently rub the eggs with oil
Once your eggs are dyed and fully dried, you can apply some oil over them and gently rub it all over the eggs so as to prevent any change of color.
General Tip: The best day to make your naturally dyed Easter eggs is just a day before Easter, so that they will be able to maintain their naturally dyed color.