Are you also a lover of dried fruits? Mango and kiwi slices, pieces of ginger, and bits of strawberries? Delicious right?
Well, I have to admit, dried fruits are one of my favourite all-time snacks to munch on when I’m too lazy to go make myself something to eat.
But, buying dried fruits from the store can definitely be an expensive deal! So, how about simply make them at home, instead!
Here’s a simple guide to making dried fruit at home:
1. Wash the fruit you’re choosing to use
Different fruits can be used to make dried fruit – mangoes, strawberries, kiwis, oranges, pineapple, raspberries etc.
So, you can rinse the fruits under running water to get rid of any impurities.
2. Peeling off the peels
In case you’re using fruits that need to be peeled, like mangoes (gently skin them), pineapple, kiwi etc., you can peel the fruit and keep it ready to cut.
3. Cut the fruit into slices or pieces
You can chop the fruit into slices or pieces of one-fourth to half-inches each. This can be done for larger fruits, while smaller fruits like berries etc., can be either halved (like strawberries, raspberries etc) or left whole (like blueberries, cranberries, etc). Fruits like apricots, cherries etc., can be just pitted and they’re ready to go.
It is essential to remember that the smaller the pieces are, the faster they will dry and get dehydrated, hastening your process.
4. Spritz some lemon juice over the fruit
Next, spritz some fresh lemon juice all over your fruits. This will prevent them from browning. This step is optional, but I’d definitely recommend it.
5. Place your fruit on a tray
In an oven-safe tray or rack, place your fruit in one layer. Make sure that no two pieces of fruit overlap. This could cause sticking of two pieces of fruit.
Always make sure to keep different types of fruits separately, as each type of fruit will vary in its time taken to get fully dehydrated. Some fruits which are smaller may dehydrate faster than the other.
Note: Place fruits which are more likely to drip down on the bottom rack of your oven, so they will not drip onto your other fruits.
6. Put them in your oven to dendrite
Different fruits have varying levels of time they’ll need to dehydrate at and sometimes even could require different temperatures.
If you’re putting multiple fruits together, then you could set your oven too 125°F. This will ensure you get rather evenly dehydrated fruit.
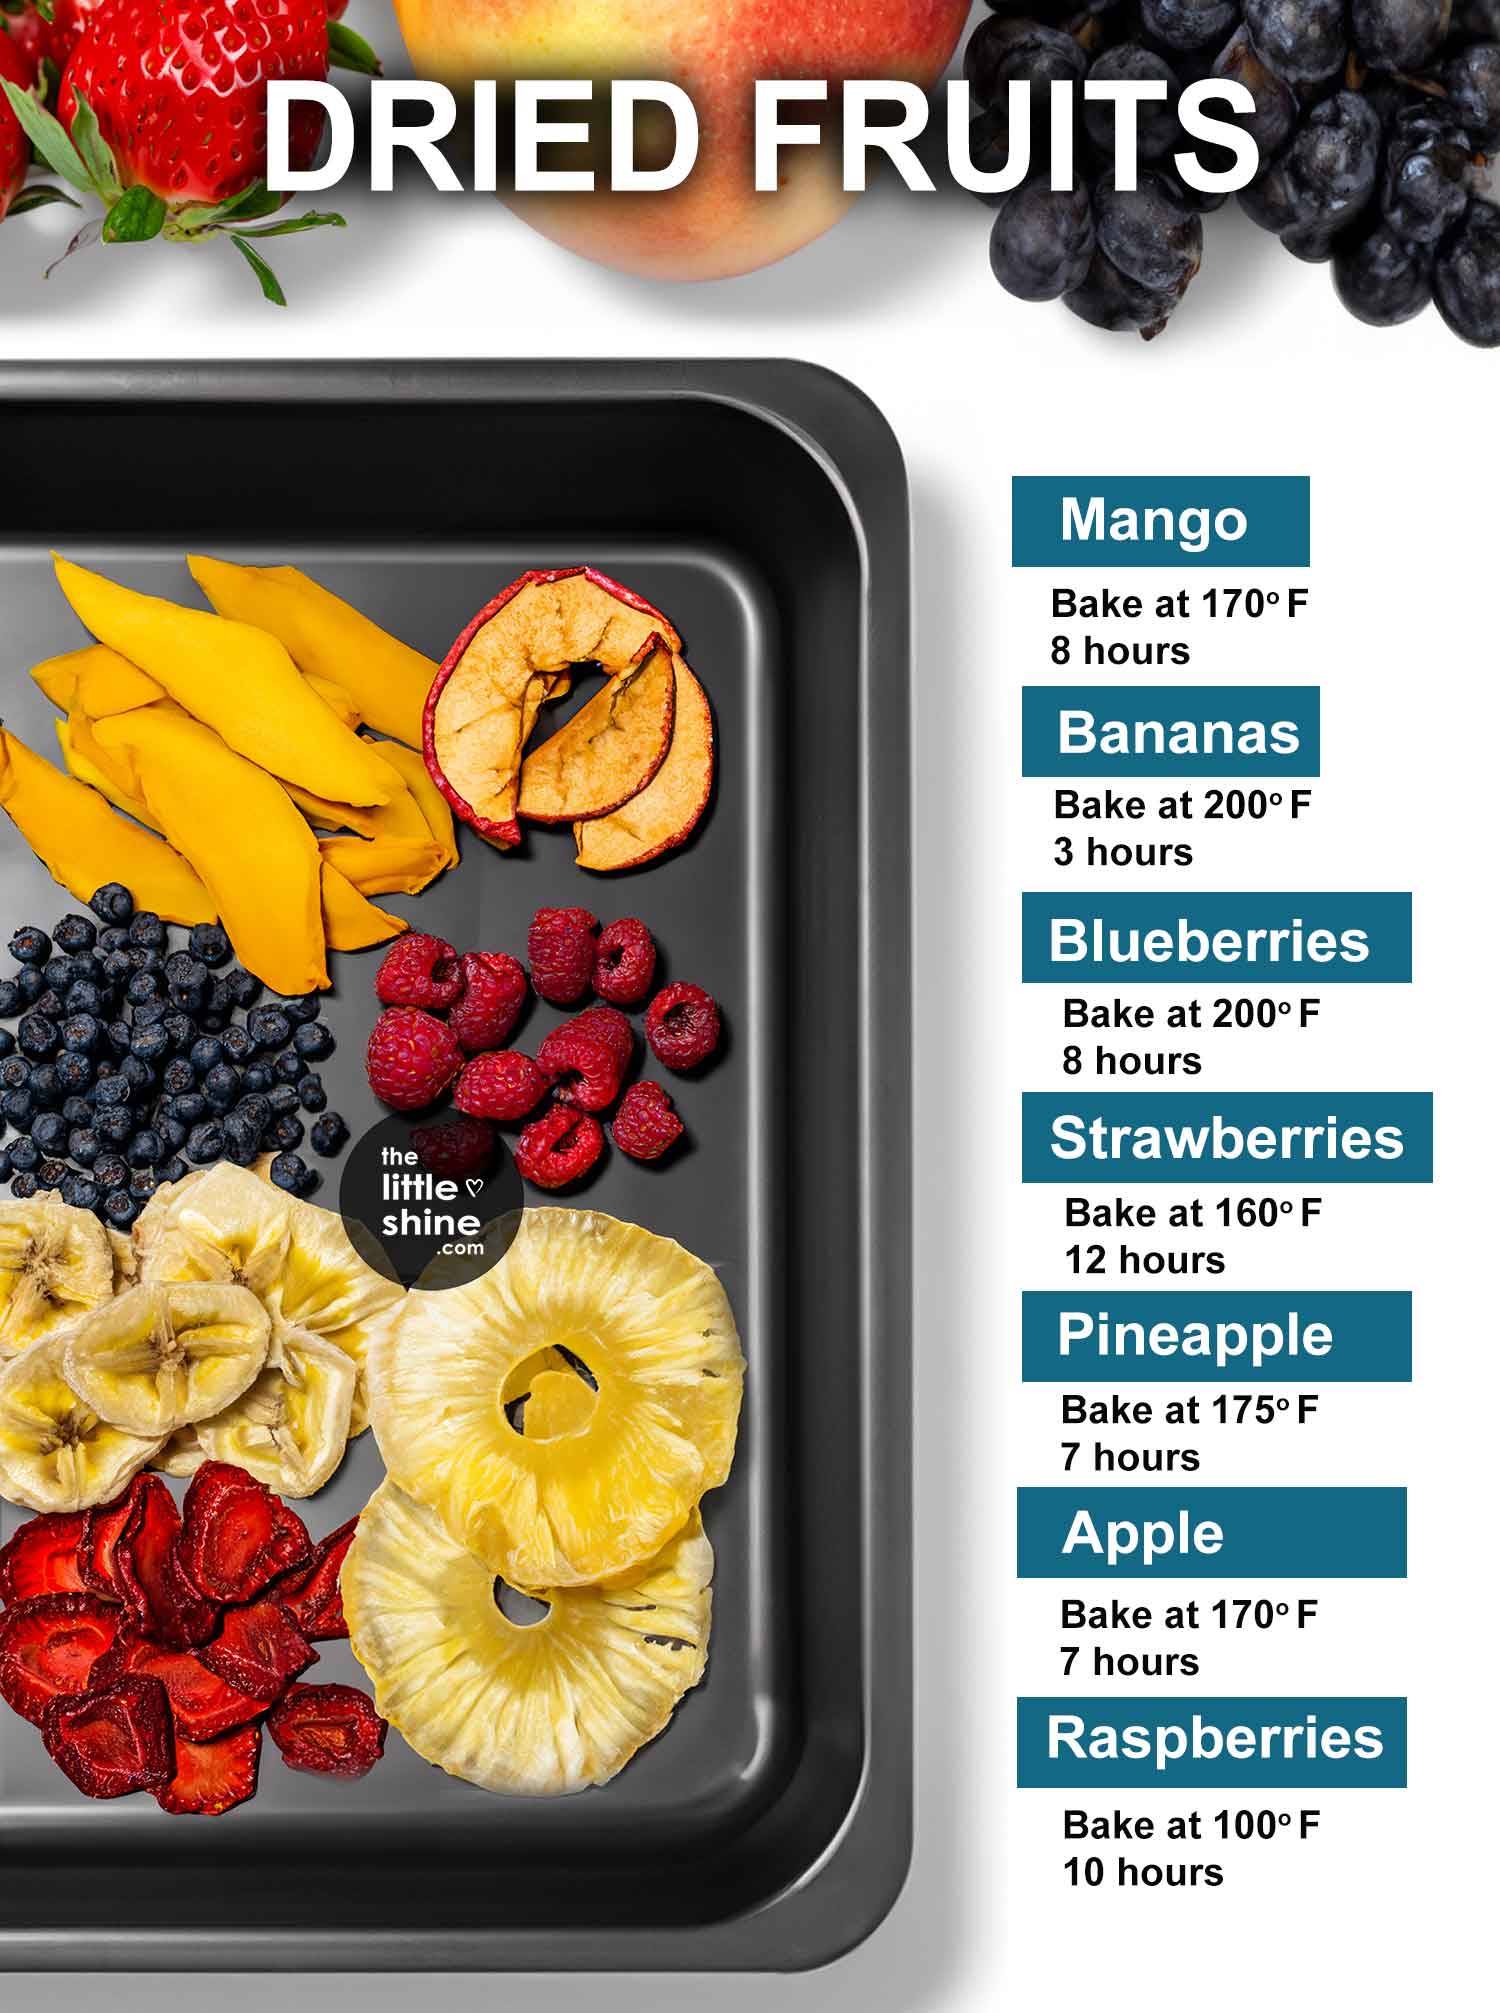
In case you’re choosing to dehydrate fruit type by type, then here is a simply guide (for common fruits) you could use:
Pineapple – Bake at 175°F for about 7 hours
Figs – Bake at 130°F for about 14 to 18 hours
Blueberries – Bake at 200°F for about 8 hours
Strawberries – Bake at 160°F for about 12 hours
Peaches – Bake at 140°F for about 12 to 16 hours
Bananas – Bake at 200°F for about 3 hours
Kiwi – Bake at 15°F for about 10 to 12 hours
Oranges – Bake at 160°F for about 8 hours
Cherries – Bake at 125°F for about 10 to 14 hours
7. Remove from oven and let it cool
Once removed from the oven, let the fruit cool completely and become crisp/leathery. Thereafter, it is ready for storage.
8. Storage Instructions
Store the dry fruits in an air-tight container (glass bottle would be preferable), in a cool and dry place.
You could also store them in zip-lock bags. Make sure that they are tightly sealed so that air doesn’t enter.
In case of long-term storage, freezing the dried fruits is also a good option. It will give it a chewier texture when it is defrosted.